- Spotify Error Code 4: No Internet Connection Detected
- Method 1: Change DNS Server to Fix Error Code 4 Problem
- Method 2: Change Spotify Proxy Settings to Fix Error Code 4 Problem
- Method 3: Add Spotify to Firewall Exception List to Fix Error Code 4 Problem
- Method 4: Add Spotify to Antivirus Program's Exception List to Fix Error Code 4 Problem
- Best Offline Listening Solution: Download Spotify Music as MP3/M4A with Spotify Music Converter
Spotify Error Code 4: No Internet Connection Detected
It's known to all that Spotify is currently the most welcomed streaming music service in the world. However, like other programs and services, users may also encounter various problems when using Spotify. One of the most discussed problems is "error code 4" problem. The "error code 4" was designed to tell users that they should connect to internet in order to use the service, however, some Spotify users reported that they don't have any problem to access other websites and services, but Spotify couldn't detect any internet connection. Here is an example.
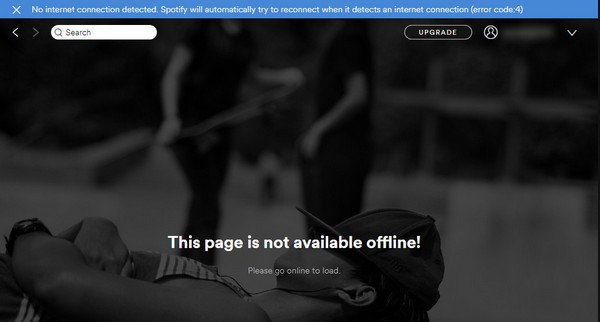
Spotify displays an error message at the top: "No internet connection detected. Spotify will automatically try to reconnect when it detects an internet connection (error code: 4)". We have summarized the solutions provided by Spotify users. When you encounter "error code 4" problem, you can try the 3 mothods below.
Method 1: Change DNS Server to Fix Error Code 4 Problem
When talking about internet connection, DNS is the abbreviation of Domain Name System. Web browsers interact through Internet Protocol (IP) addresses. DNS translates domain names to IP addresses so browsers can load internet resources.
Generally speaking, most users use default DNS server provided by their ISP's provider. However, sometimes, Spotify may not recognize the ISP's DNS server. In this case, you can switch your DNS server to free, reliable and public DNS servers like Google DNS and OpenDNS.
It's easy to change DNS server, but still you need several steps. The steps will be different on Windows and Mac.
Change DNS Server on Windows 10
1. Right click on your network or Wifi icon at the bottom right corner and click "Open Network & Internet settings".
2. In "Change your network settings" section, click "Change adapter options".
3. In "Network connections", right-click on your network or Wifi icon and click "Properties".
4. In the property window, choose "Internet Protocal Version 4 (TCP/IPv4)" which most people are using. However, if you are sure that you are using IPv6, please choose "Internet Protocal Version 6 (TCP/IPv6)". After selecting, click Properties button.
5. In the opened property window, check "Use the following DNS server addresses". Then enter the DNS addresses. Below are free ones from Google and OpenDNS.
- Google DNS: 8.8.8.8 & 8.8.4.4
- OpenDNS: 208.67.222.222 & 208.67.220.220

6. Click OK to apply the DNS. Then relaunch Spotify and "error code 4" problem should be solved.
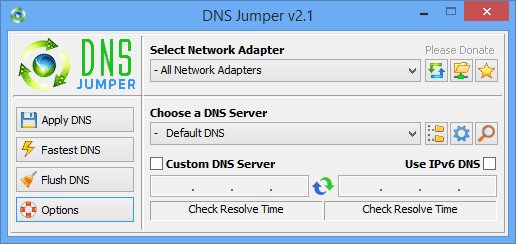
By the way, you can also use freeware DNS Jumper to change DSN server in only 1 or 2 clicks without complicated settings.
Change DNS Server on Mac OS X
1. Click System Preference icon in the dock and click Network.
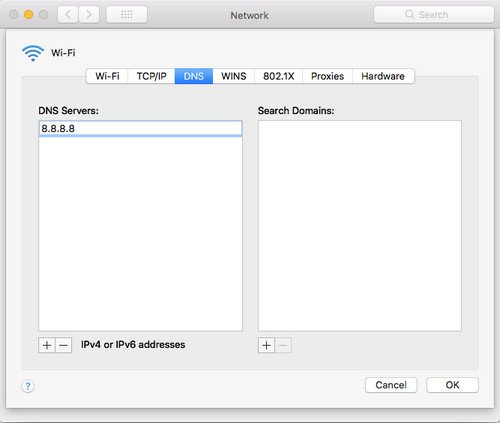
2. In Network window, click Advanced... button and click DNS tab.
3. Click + icon in the left bottom, and enter Google DNS address 8.8.8.8 or other DNS address you like. You can click + button again to add another DNS address. Click OK button.
4. You will go back to Network button, click Apply button to apply the settings.
Change Spotify Proxy Settings to Fix Error Code 4 Problem
Some users reported that proxy change in Spotify settings can fix the "error code 4" problem. The steps are as below.
1. Click V button near your user name in the top right cornor and click Settings.
2. Scroll to the bottom and click "SHOW ADVANCED SETTINGS" button.
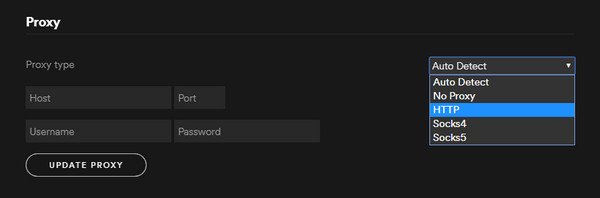
3. Scroll down to Proxy section. Switch "Auto Detect" to "HTTP". You don't need to fill out the Host/Port/Username/Password fields.
4. Click "UPDATE PROXY" button.
This may work for some users. However, some users said they need to toggle between "Auto Detect" and "HTTP".
Method 3: Add Spotify to Firewall Exception List to Fix Error Code 4 Problem
Sometimes, Windows/Mac firewall settings could be also the problem. And you need to add Spotify as allowed application.
Add Spotify to Firewall Exception on Windows
1. click the Shiled iocn at the bottom right to open "Windows Defender Security Center".
2. Click "Firewall & network protection" on the left panel and click "Allow an app through firewall" on the right panel.
3. Click "Changes settings" button first to enable "Allow another app" button.
4. Click Browse button and browse to C:\Users\(Your Username)\AppData\Roaming\Spotify folder and choose Spotify.exe.
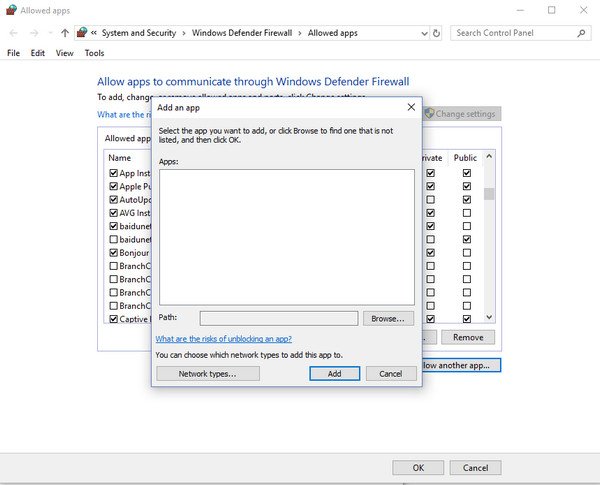
5. Click Add button and apply the changes.
Add Spotify to Firewall Exception on Mac OS X
1. Click System Preference icon on the dock and click "Security & Privacy".
2. Go to Firewall tab and click the lock icon in the left bottom to make changes. When promoted to password, enter your administrator password and click Unlock.
3. Click "Turn On Firewall" button and click "Firewall Options..." button.
4. Click + button and Mac will automatically go to Applications folder, select Spotify and click Add.
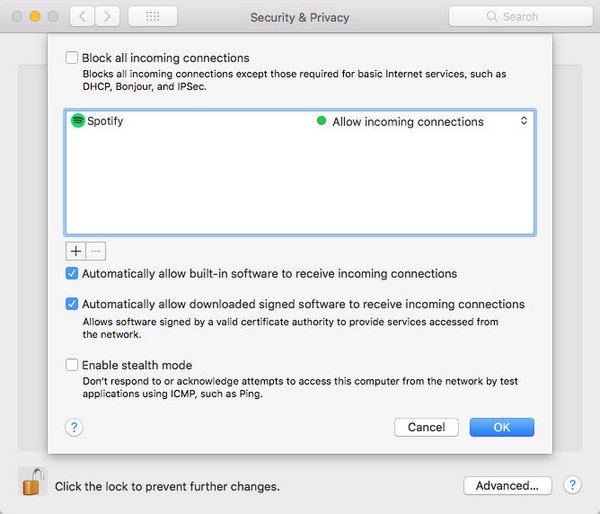
5. Click OK to apply the changes.
Method 4: Add Spotify to Antivirus Program's Exception List to Fix Error Code 4 Problem
Some anti-virus programs may block the startup of Spotify, or there may be incompatible issues. Users have reported that NOD32 anti-virus had general imcompatibilities problems with Spotify. Of course, you can uninstall NOD32 and install another anti-virus, but if you want to keep using NOD32, you may need to add Spotify to exception list.
1. Open ESET Smart Security or ESET NOD32 Antivirus.
2. Press the F5 key to display the Advanced Setup window.
3. From the Advanced Setup tree, click Antivirus and antispyware > Exclusions and then click the Add... button.
4. Browse to C:\Users\(Your Username)\AppData\Roaming\Spotify folder and Spotify.exe and click OK to save changes.
If you are using other anti-virus program and have same problem, you can also try to add Spotify to exception list. Depending on the anti-virus, the settings are also different.
Best Offline Listening Solution: Download Spotify Music as MP3/M4A with Spotify Music Converter
If you want to enjoy your favorite Spotify songs offline, you need to download Spotify songs first. We all know that Spotify comes with two tiers. Spotify Free doesn't allow users to download, while Spotify Premium can download songs for offline listening on PC, iOS and Android devices. However, you may also want to enjoy the songs on your portable media players like iPod, Sony Walkman and MP3 players. That will require a program which can download Spotify songs as MP3 or M4A. Luckily, you are here to meet TuneMobie Spotify Music Converter.
TuneMobie Spotify Music Converter can convert Spotify songs, albums and playlists to MP3 or M4A in bulk with high quality and keep all the ID3 tags like song title, album, artist, artwork, track number, genre, etc.
Spotify Music Converter works perfectly for both Spotify Free and Spotify Premium. Besides, it is available on Windows and Mac and fully compatible with latest Windows 10 and Mac OS X. It's the ultimate solution to avoid "error code 4" problem. Downlaod Spotify Music Converter to have a try now.
Follow the steps below to download your favorite Spotify songs, albums or playlists as MP3/M4A.
Step 1: Launch Spotify Music Converter and Spotify will be launched automatically. Do not close Spotify when using the program.
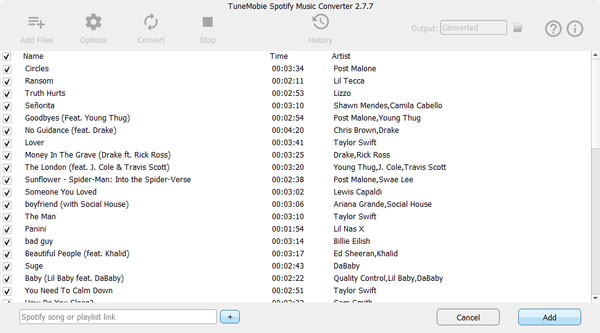
Step 2: Click "Add Files" button then drag and drop songs, albums or playlists from Spotify to Spotify Music Converter. Or you can copy link in Spotify first and paste in the blank area of Spotify Music Converter.
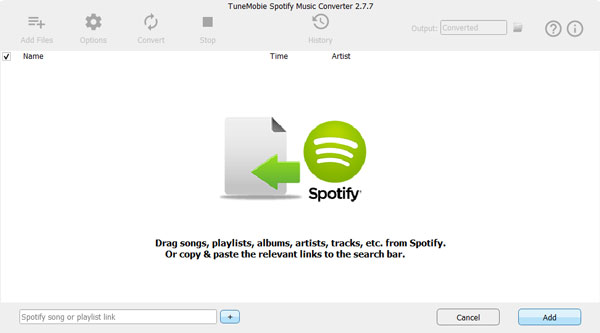
Step 3: Spotify Music Converter will list and check all the songs in the album or playlist. You can easily uncheck any songs you don't like. Then click "Add" button to add the songs to conversion list.
Step 4: By default, the program uses 320kbps MP3 as output. If necessary, click Options button to change output format to M4A. If necessary, you can change output folder and bitrate, etc.
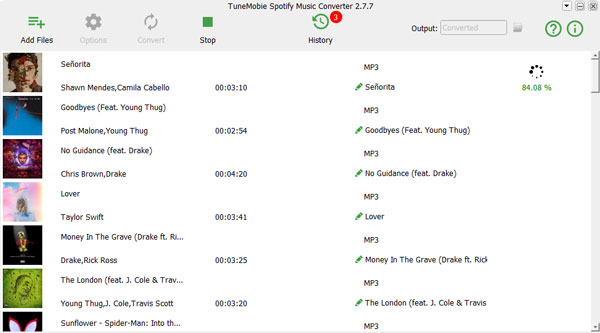
Step 5: Now simply click Convert button to start downloading Spotify songs, albums or playlists as. MP3/M4A for offline listening.
Using Spotify Music Converter, you can download all your favorite Spotify music as MP3 or M4A, add them to iTunes library and sync to iPhone, iPod, iPod Touch as well iPod Nano/Shuffle/Classic, or copy the songs to Sony PSP, Sony Walkman, MP3 player or other devices.
Have you ever encountered Spotify "error code 4" problem? If yes, do not hesitate to try the solutions introduced above. And also try Spotify Music Converter for best offline listening experience.