- Part 1: How to Save or Move Apple Music Songs to the SD Card on Android Devices?
- Part 2: Apple Music Songs on the SD Card Can't Be Read or Used
- Part 3: TuneMobie Apple Music Converter: Great Solution to Save Apple Music on SD Card
- Part 4: Convert Apple Music Songs to MP3/M4A/WAV Step by Step
- Part 5: Copy Converted Apple Music Songs onto SD Card
How to Save or Move Apple Music Songs to the SD Card on Android Devices?
More and more Android devices no longer support SD cards. Because a large capacity can have a greater profit than a cheap SD card. If your Android device still supports SD cards, you should take advantage of it. Now more and more people listen to apple music on Android. The storage space of some Android users is not particularly large, and many songs downloaded from Apple Music also take up space. If the mobile phone supports SD card, it is definitely worthwhile to move the downloaded songs to the SD card. Therefore, many Android users want to move the downloaded apple music to the SD card to free up more built-in space.
If you log into Apple Music for the first time on an Android device that supports SD cards, we recommend that you designate SD cards as storage space before downloading songs.
Regardless of whether you specify the SD card as the storage space, or move the downloaded offline Apple Music songs to the SD card, the operation steps are the same. The apple music app supported sd card as early as 2016, so as long as the apple music app is not too old, you can complete this setting without upgrading.
Here are the steps to save or move apple music to sd card on android.
Step 1: Tap on Apple Music app icon on your Android screen to launch it, tap on menu icon in upper left and click on Settings.
Step 2: Click "Download Location" option in the Downloads section, click Yes in "Change download location to SD card?" popup dialog. In this dialog, you can also see the note that "The music currently stored on your device will be transferred to your SD card."
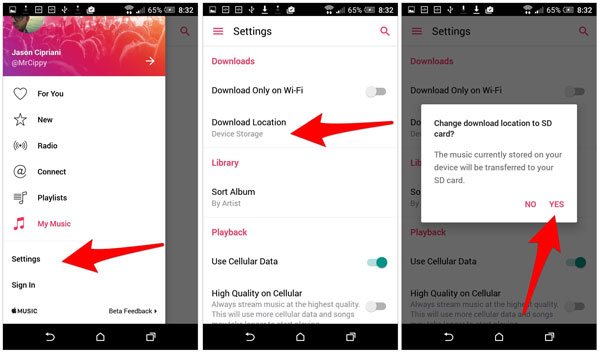
Step 3: Simply accept the prompt when you are asked whether you want to move all of your currently downloaded music, along with any future music to your SD card. Depending on the songs you have downloaded, it may take a few seconds or a few minutes to finish the transferring.
If you change your mind and want to move the Apple Music songs from SD card to built-in device storage, the steps are also the same. You just need to make sure there is enough built-in storage. If your device doesn't support SD card, you won't be able to see the option to change storage locations.
Apple Music Songs on the SD Card Can't Be Read or Used
Now you have successfully moved or saved downloaded Apple Music songs on the SD card. However, sometimes, you may need to remove the sd card from the Android device and insert it into other devices for file sharing purposes, or you may want to play songs stored on the sd card on other devices. If you try to play apple music songs that are on the sd card, you will get a bad result that the music player doesn't recognize the songs at all.
If you have installed some video editing apps on your Android device, you may also want to use your favorite Apple Music songs as background music. However, no video editing app can successfully add apple music songs from SD card as background music.
All of these failures are due to Apple Music's DRM protection. DRM protection prevents these Apple Music songs from being read or used like plain audio formats including MP3, M4A and WAV. Therefore, many users have raised this question: what is the best way to store Apple Music songs on SD card?

In fact, as long as you convert Apple Music songs to MP3, M4A or WAV, and then copy them to the SD card, all problems will be solved. And TuneMobie Apple Music Converter is the very tool you will need.
TuneMobie Apple Music Converter: Great Solution to Save Apple Music on SD Card
TTuneMobie Apple Music Converter has an easy-to-use interface, powerful conversion capabilities for Apple Music, various commonly used output formats and various convenient output settings. Most importantly, the 20X conversion speed can save you a lot of time.
- Batch convert Apple Music songs, albums and playlists to plain audio formats
- Provide MP3, M4A, WAV, AIFF and FLAC as output formats you can save on SD card
- Convert Apple Music songs with a built-in Apple Music web player without using iTunes or Music app
- Losslessly convert 256kbps Apple Music AAC streaming to 320kbps MP3 or 256kbps M4A
- Preserve all ID tags including title, artist, album, genre, track number, disc number, etc.
- Save your time by converting Apple Music at 20X faster speed on both Windows and Mac
- Rename output files in bulk by title, album, artist, track number, hyphen, space, etc.
- Sort output files into folders by album, artist, album/artist or artist/album
- Fully compatible with latest Windows and macOS (Intel & Apple silicon)
The free trial version of TuneMobie Apple Music Converter can only convert 3 minutes of each song and only convert 3 files at a time, but this is enough for you to test whether you can enjoy save Apple Music songs on SD card like saving normal audio files. If you have subscribed Apple Music and you have an Android device with SD card, please do not hesitate to download the program to have a try now.
Convert Apple Music Songs to MP3/M4A/WAV Step by Step
TuneMobie Apple Music Converter is extremely easy-to-use, both software veterans and novices can know how to use it in a few seconds. If necessary, you can also check the steps below for your reference.
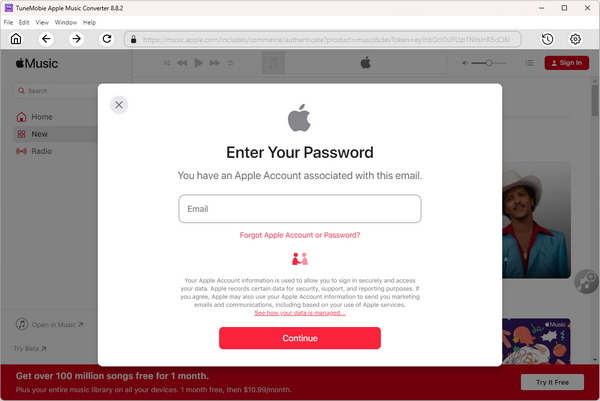
Step 1: Launch TuneMobie Apple Music Converter and Sign in
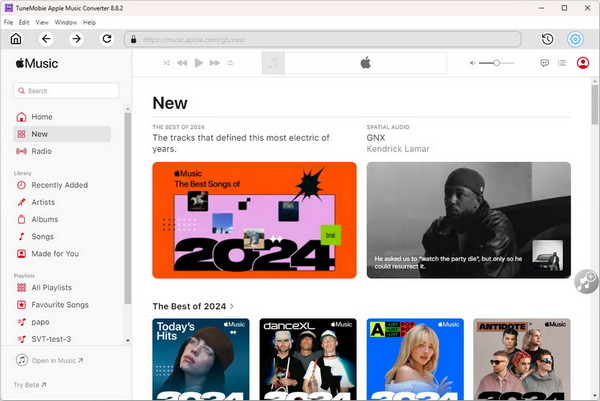
Launch TuneMobie Apple Music Converter and you will see a built-in Apple Music web player. Click "Sign In" button at the upper right to sign in the Apple Music web player. You don't need to enter Apple ID and password next time if you don't sign out. After signing in, all Apple Music playlists in your library will be displayed in the left panel.
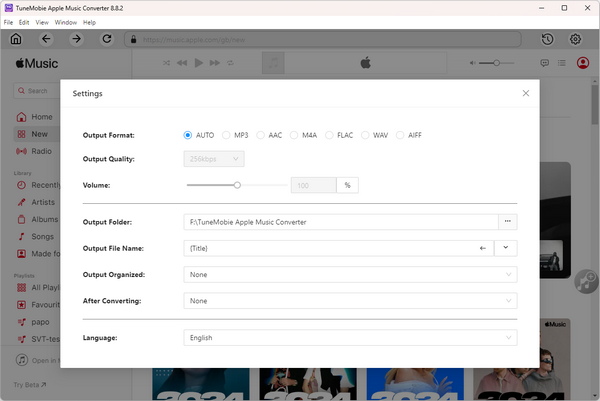
Step 2: Choose Output Format
The default output format is AUTO option, which is 256kbps M4A. If this is OK for you, you can go to next step directly, if necessary, you can click Settings icon at the upper right to open Settings dialog, then change output format to MP3, WAV, AIFF or FLAC. In the same dialog, you can also change output folder, the way of renaming and sorting output files, action after conversion, etc.
Step 3: Open Apple Music Album/Playlist
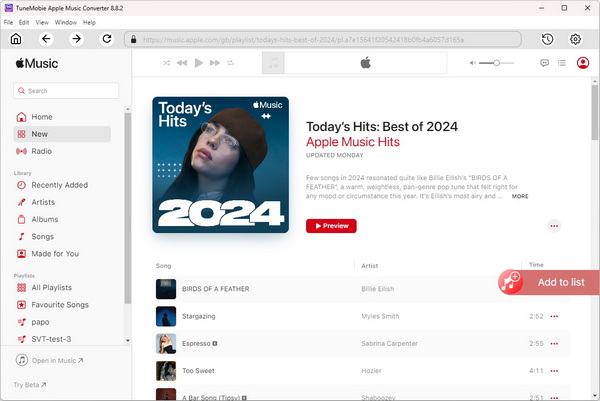
Go back to the built-in Apple Music web player and browse your favorite album or playlist, then open the detailed page of an album or a playlist and song list will be displayed.
Step 4: Add Album/Playlist to Conversion List
You can easily find a button in the center right, move your mouse to the button and it will be changed to "Add to list" button. Click "Add to list" button to add all the songs in the album/playlist to conversion list.
Step 5: Choose the Songs
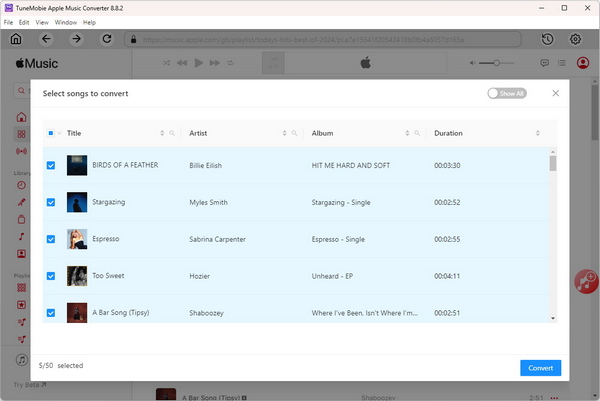
All the songs will be checked by default. If you don't want to convert some of the songs, you can simply uncheck them.
Step 6: Start Apple Music Conversion
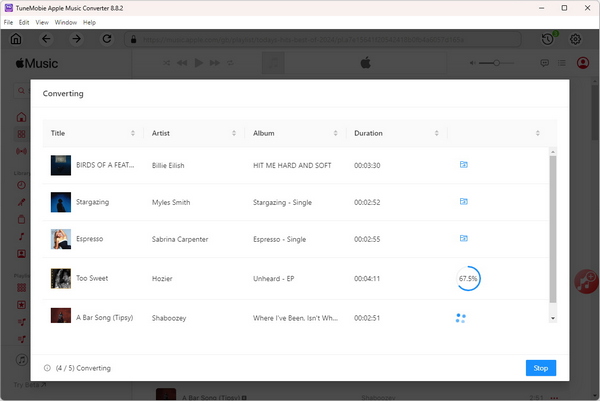
Now simply click the Convert button to start converting Apple Music songs to your selected format. 20 times faster conversion speed allows you to get the output file without waiting too long.
Copy Converted Apple Music Songs onto SD Card
What needs to be done now is to copy the output files of the Apple Music conversion to the SD card. First remove the SD card from the Android device and connect it to the computer. Depending on your computer, there are different situations for connecting the SD card.
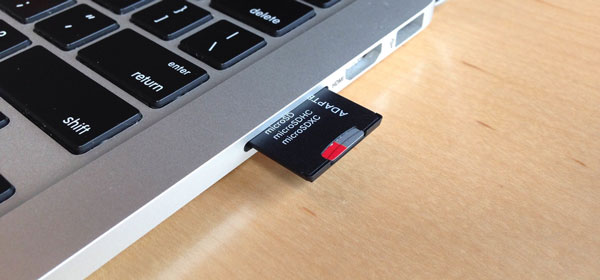
If your computer has an SD card slot, just insert the SD card directly into the slot.
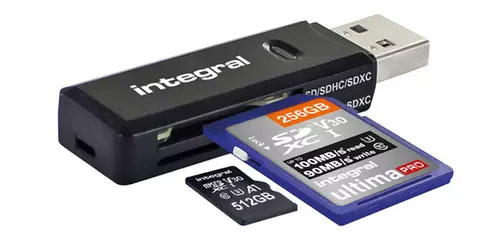
If your computer does not have an SD card slot, you need to prepare a card reader in advance, insert the SD card into the card reader, and then insert the card reader into the USB port as a USB device.
Either way, the SD card will appear as a USB flash drive. Now you can simply copy the output songs onto SD card. Sometimes, you may need to copy the songs to "Music" folder because some devices can only load the songs in this folder.
Botton line
The file loading speed of the SD card may be slightly slower than that of the built-in storage, but with the same storage space, the SD card can save a lot of money. If you are using an Android device that supports SD card, and you are also using Apple Music, and want to play and use Apple Music songs more flexibly, please do not hesitate to download TuneMobie Apple Music Converter to have a try.